Read: In contrast to most other manufacturing techniques, 3D printing must control the accuracy of two structures of the part: the outer wall and the filler. The outer wall, which is the outermost area of the part, and the filler, which is whatever is present inside the part. Usually printers have some degree of control over the outer currency, but the filler is more dynamic and plays a huge role in the part's strength, weight, structure, buoyancy and more. In 3D printing, the user can define many parameters to control the type of fill used for the part.
Of all these parameters, two are the most important: fill density and fill pattern. Here we will take you through a few different manufacturing methods to understand "fill" and better understand how it works in 3D printing.
3D Printing vs. Traditional Manufacturing
Filled 3D printing is different from other more traditional manufacturing methods. Let's take injection molding and subtractive manufacturing as examples. Injection molding involves inserting material into a mold to form a part, and due to the nature of the technology itself, controlling the internal structure is simply not possible. As a result, injection molded parts are either solid or hollow (using gas injection molding), with nothing in-between. Reduced material manufacturing, such as CNC machining, requires cutting of the material. Similar to injection molding, the filler cannot be adjusted, so the interior is completely solid. However, 3D printing allows for the design of any dough and the manufacturing of extruded material layers.
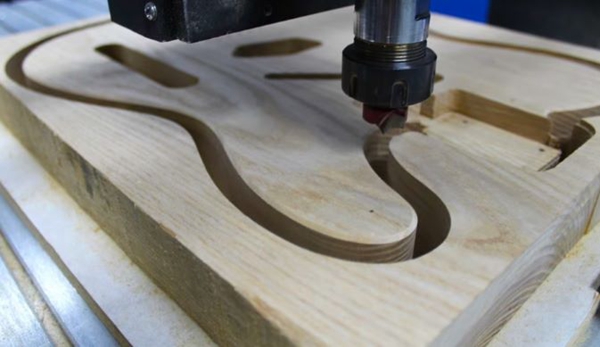
Infill density significantly affects material consumption
△Fill density significantly affects material consumption (source: BozarthPrime via Myminifactory)
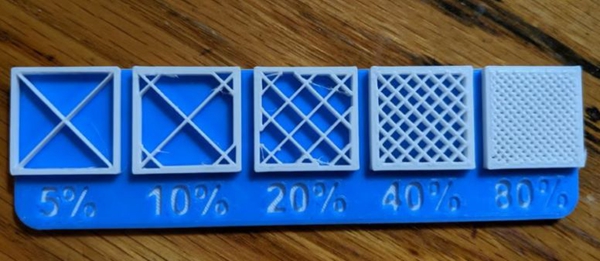
Fill density is the "fullness" of the part's interior. In the slicer, it is expressed as a percentage from 0 % to 100%, where 0% means partially hollow and 100% means completely solid. Fill density greatly affects the weight of the part: the fuller the part is inside, the heavier it will be. In addition to weight, print time, material consumption and buoyancy are also affected by fill density. The same is true for strength, which is of course related to many other factors such as material and layer height.
Some slicers also allow different fill densities to be used within the same part. This is called variable fill density, and specific settings in the slicer program allow the user to specify any density variations required for different areas of the print. So, what percentage of fill density should be used in actual printing?
For most "standard" prints that do not require super strength, it is recommended that a fill density of 15-50% be used. This density percentage will reduce print time, save material, and provide good strength.
● Functional prints need to be strong. Therefore, it is recommended to use a higher fill: more than 50%. This setting consumes longer print times and more filament, but results in stronger parts.
● For figurine models used for display purposes only, it is recommended to use a fill density of 0-15%. This increases the print speed and does not consume much filament at all. Models printed at this density range will be light, but not very strong.
Recommended settings
1. Standard printing: 15-50%
2. Functional prints: 50-100%
3. Figurine and model prints: 0-15%
4. Flexible prints: 1-100%
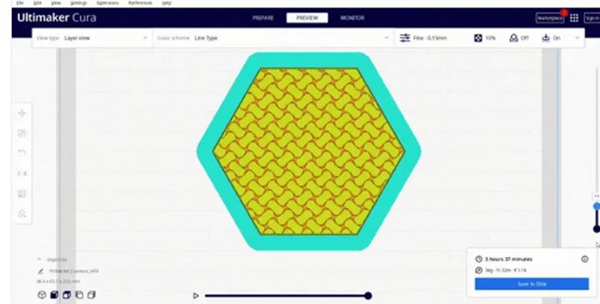
Filling pattern
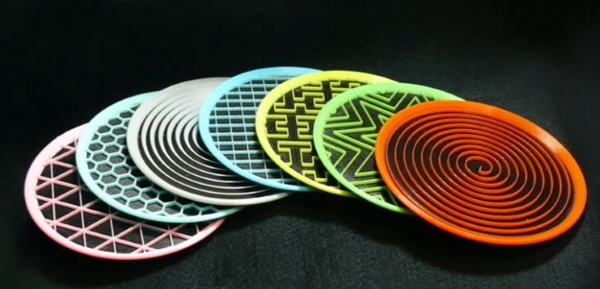
△ Different infill patterns offer a variety of strengths and stunning designs (source: MilesFromNeihu via Thingiverse)
Infill patterns are the structure and shape of the material inside the part. From simple lines to more complex geometries, fill patterns can affect the strength, weight, print time, and even flexibility of a part. There are many different fill patterns in different slicer programs. For example, Cura (2.2) has 14 different fill patterns to choose from, while PrusaSlicer (2.5) has 17 and Simplify3D has 6.
As with fill density, different fill patterns have different properties such as complexity, material efficiency and the number of connected planes of strength (2D or 3D). For example, the spiral pattern connects the outer walls in three dimensions, providing more overall strength. As a result, this pattern takes up more material than patterns such as lines. So which fill pattern should I choose?
Line: Line fill patterns contain lines printed in one direction (along the X- or Y-axis) on every other layer. This fill pattern provides strength in only two dimensions and facilitates fast printing. Line patterns do not use much material and are very light in weight.
Honeycomb: As the name implies, this pattern creates a honeycomb structure that creates an attractive visual effect. This fill pattern is suitable for semi-rapid printing where medium strength is required and does not consume too much material.
● Grid: The grid fill pattern resembles lines in appearance, but instead of unidirectional lines on every other layer, each layer contains two-dimensional lines with twice as much space between them. This pattern provides two-dimensional power, but is still somewhat powerful. Grid patterns consume an average amount of material and take a moderate amount of time to complete.
● Triangles: The triangle pattern looks like overlapping triangular lines, with the lines extending in three directions in the XY plane. This fill pattern provides strength in only two dimensions, but is still suitable for prints that require strength.
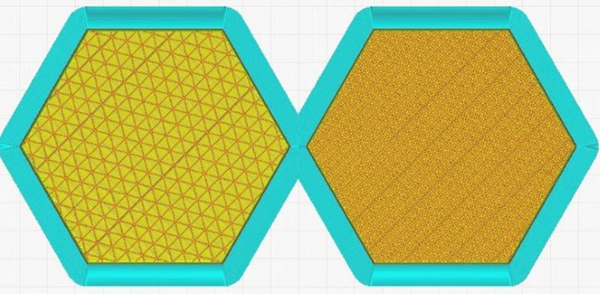
The triangles of △Cura are filled at two different densities (source: All3DP)
● Three-way hexagon: The three-hexagonal fill pattern contains various lines extending in three directions in the XY plane, forming a hexagonal pattern with a triangle in the middle. This fill pattern provides a two-dimensional intensity that is ideal for strong prints.
● Cubes: This pattern produces stacked cubes, but because they are tilted 45 degrees around the X and Y axes, they look more like triangles at any given moment. The pattern provides excellent strength in three dimensions, but requires more material and time than other patterns.
● Octet: The octet fill pattern is similar to the cube pattern, but instead of adding tilted triangles, the pattern materializes as a square. This fill pattern is a three-dimensional pattern that not only looks great, but is also useful for parts that need strength.
● Spiral: The spiral fill pattern may look the coolest, but it is also arguably the strangest fill pattern. It consists of concave irregular curvature that eventually crosses the path. It is designed to strike the best balance between strength, material and print time.
△ Spiral Filler for dazzling printing
● Concentric: Concentric fill patterns are internal structures consisting of concentric lines that match the part's contour (i.e., its circumference). This pattern can be printed quickly, is suitable for flexible parts, and consumes much less material than most patterns.
Recommended settings
1. Standard print: grid or triangle
2. Functional prints: cubes, spirals or octagons
3. Figurine and model prints: Lines
4. Flexible prints: concentric
Other notes
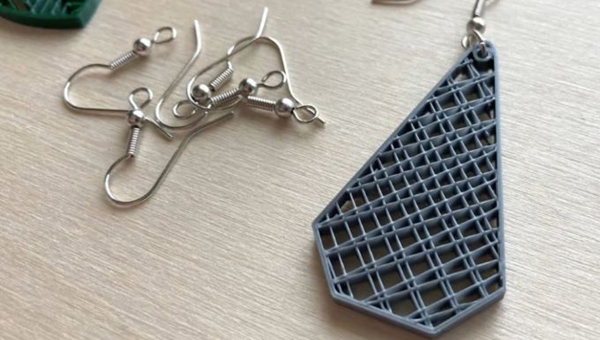
△-fill patterns can be an aesthetic feature of prints (source: Penolopy Bulnick via Instructables)
In addition to patterns and densities, there are two other types of fill settings worth noting: variable settings and artistic patterns. Both allow you to be more creative with your fill settings. Variable settings allow you to adjust the fill density as the part progresses through the layers. For example, if you want the bottom of the part to have 10% fill until layer 30, and then switch to 50% fill, the Variable setting allows you to do this. Infill for art is a way to turn different fill patterns into artwork. This process looks great on earrings, pendants and other jewelry and artwork.


